Pages

Showing posts with label organization. Show all posts

Friday, March 9, 2012

Recipe Organization

I have been (attempting to) follow along with the 52 Weeks of An Organized Home Challenge. I won't say I've done every challenge, but I have done most; the one I was most excited about was this one: Organize Recipes and Cookbooks. What I really like about this challenge is that every week, she send you an email with the challenge, and suggestions of different ways to complete it.  I had been planning to make up a recipe binder for all my paper recipes- I have magazine pullouts, recipe cards, cookbooks, ideas on the computer, Taste of Home magazines... so confusing when I know i have a recipe and can't remember where it is!  I'd always seen recipe binders and thought it was the best option.  But in the challenge, she included a section on digital organization and mentioned Evernote


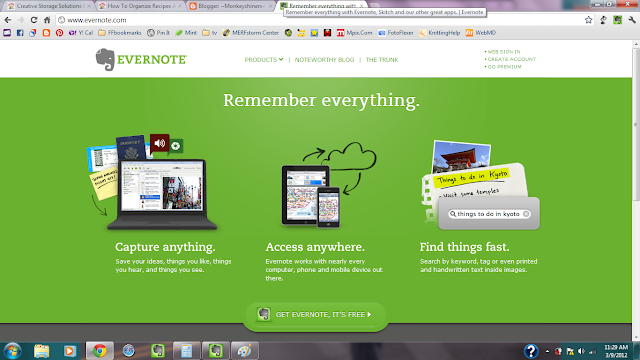
I LOVE IT.  I'd heard of it before but for some reason had decided against using it (just in general, not even thinking of recipes). When she suggested it as an option, I went back and revisited. It is an amazing program and it is FREE!  


You can get an Evernote app for almost anything- I have it on my computer, Nook, and I-Pod Touch. So you can access it anywhere.  


The sidebar is where you can see your "notebooks"

As you can see, I'm not only using it for recipes, and haven't even begun to really use it as I hope to.  But you can see above that you can create sub-groups of notebooks, such as my "RECIPES" group above. Below I have all my categories.  And within each notebook, it looks like this.
On the far left, is the sidebar I have already shown you. The next row is all the Notes within the chosen Notebook. You can see I have chosen the "Main" notebook to show you.  So the second row has all the recipes I have collected so far within the Main category.  As you choose it, it shows up in the view box.  You can edit, add tags, comments etc.  This recipe was taken from the web using the Evernote clipper, which is amazing!  You can snip out any part of a webpage you want and put it in evernote! The program automatically records the URL in case you need to easily find it again.  This all is made even easier by the Evernote Clearly tool, which gives you a screen with just the article, no buttons, ads, etc. This makes for non-distracted reading, but also is a super easy way to clip just what you want from the page. The purple lettering above is  my note after making this for dinner!


Now to menu plan, I've begun to use the "recipes to try" notebook.  There are several super easy ways to change the notebook of an item; you can grab the item from the second row, where the notes are listed, and pull it to the notebook you want, or you can click on the upper right of the note and change it from a drop down menu. So I pull recipes I want to try into the notebook, and put them back as I'm finished.  


Recipes I have already typed out on the computer (I had been attempting to do nice recipe cards) can just be copied and pasted into a note. You can pull in pictures if you have them, add pdfs, links to other recipes and tons of other things I've not even discovered.  


I have been loving that I can pull things up on my ipod or nook (since we only have one computer, its nice to not need it for a recipe). And since our internet is spotty, it is amazing to have all these on the computer, but also backed up to Evernote's site. I don't have to worry about losing them if our computer crashes! And I've found on my ipod that if I connect to the internet and open a note, its then available there as I need it, internet or no!


Another amazing thing about Evernote is the search function. It can search within things you've typed, things you've clipped from the internet, pdfs, almost anything!  So if I have some avocados I need to use up, all I need to do is search for "avocado".
Obviously, I need some more avocado recipes, but get the picture?  I'm not even positive I need all the separate category notebooks with the search and also the tags (categories, like you can do with your pictures). But they are there for now...


According to the Evernote site and blog, people are using evernote to organize their entire lives.  Financial information, tax preparation, trip planning. Its amazing.  


My goal is to be able to get rid of all the paper recipes I have floating around.  I plan to scan in all my magazine pages (apparently there is a "scan to evernote" app for some printers that I haven't been able to set up yet that makes it so easy), copy and paste all my typed recipes, and clip ones I find on the internet.  For now, I've been using Pinterest for meal inspiration and ideas.
and moving them into Evernote as I use them, either from Pinterest, my computer, or a paper recipe.


I also created notes like this:
Here, I plan to write my favorite recipes from my cookbooks. I'm not quite ready to get rid of those yet, though the recipes from books I use less frequently may end up being scanned into evernote...


The possibilities are almost endless.I am so glad I discovered this and really excited about seeing the potential in organizing the rest of my life!  


UPDATE!!!
I remembered seeing something on the evernote blog about linking notes... I went searching (found it on the first try!) and ... AHA!  The perfect menu planning system. So ignore what I wrote above, this will save time and I won't have to put recipes "away"!
It might be hard to see... but I made myself a table with the days of the week.  See the letters on the left side?  That's the link to the recipe I'll use that day!  By right clicking on a recipe (on that middle bar with the pictures) and choosing "copy note link", you copy the URL and can then past it into your chart (control + v). I still will write them out on my notepad (I got a days of the week notepad in the dollar section at walmart that I've been using) for quick peeks at the menu when I'm not at my computer, but this way I'll have it here too! And it will be easier to find the recipes for each day. 

Monday, December 20, 2010

Mei Tei roll-up

I don't usually do this many posts, but I'm having trouble with the networked blogs thing (auto posting to facebook) and wanted to test it again!

I had this little brainstorm about my hooded mei tei I made. It was feeling a little awkward to carry with all those straps hanging around, and my first move was to stuff it into a little tote bag  I had.  This worked well, but later I wondered if the hood couldn't be used to turn it into a little pouch of its own. And Viola! 
Here's the way I did it:
Start by laying your mei tei out and folding all the straps into the center.
Roll it up into the thirds (main body only).

Then wrap your hood over.


Flip it and tie your hood strings togehter to make a handy little package with everything tucked away UN annoyingly inside!

See how small and compact it becomes?!
Now if you have a purchased meitei... I guess you're stuck with the little tote bag idea.  How do you carry your carrier?

Friday, September 3, 2010

Little Notepad

Check out my friend Rebecca's blog, The Mommy Saver: Moms saving money, time and sanity. She gives tips for saving time and money in your household as well as yummy freezer cooking recipes. And, she's doing a giveaway right now of my Monkeyshiners items!  Check out her blog  here and enter to win a pacifier leash, bib clip, OR $5 off your purchase! Giveaway ends Friday, September 10.

now on to the Notepad...

I carry a little 3x5 notepad with me in my purse. It contains my price list, a la OrganizedHome.com where I write down the prices for things I usually use so I know when I'm getting a great deal.  I tend to forget what I've paid in the past! I'm a big yard saler so it also contains my lists of the kids' clothes I've bought in larger sizes. It is getting pretty beat up in my purse and I saw this cute little mini list taker on etsy, and based my project on this.
Here's mine:
The ribbon holds it closed.  I love how the peicing turned out- Mainly I was just trying to find cute fabric for it and didn't have enough in all one piece.  The inside fabric took about 6 peices sewn together! 

See how beat up that poor little notebook is? I'm tempted to buy a new one but I don't want to be wasteful...It's a little too short for my mechanical pencil but I have a "normal" pencil that fits perfectly. and it has a perfect little pocket there on the left side for notes or reciepts. Now I need one for my flip top memo pad and my larger mini-journal!  Back to the sewing machine...

Thursday, August 19, 2010

My Housecleaning chart

I am a terrible housekeeper. I really dislike cleaning (until I start doing it, and then I don’t mind so much). It’s the idea of it, I think! And now that I’m home full-time, with an infant who still isn’t moving, and a toddler that does a fairly good job of entertaining herself, one would think my house would be sparkling… Not so much. I’m very easily distracted (ooh, shiny!). So in this, my very first official post in my home organization journey, I’ll share my plans to remedy this situation!
 
My initial attempt was through the file card system set up by the Sidetracked Home Executives. I found out about this through organizedhome.com and between this site and the book I found at the library from the Sidetracked Home Executives, decided to give it a try.
In a nutshell, for this system, you put each task on its own card and then file it in the correct day in your box. Each morning, you pull out your cards and know what you are to do each day. You use a certain color card for daily tasks, a different color for weekly, etc. As you complete each task you file it where it belongs (the next day for daily tasks or the appropriate day of the week if its weekly, etc.). This is a fairly simplified description as there are also ways to keep track of seasonal tasks, monthly tasks, etc. I was so excited by this and thought it was really going to keep me on track. However… I disliked the box and piles of cards on my counter all the time, and got a little overwhelmed seeing all those cards.

Which leads to attempt #2.
This time, I decided to add daily checklists to my notebook (the organized home site describes the “household notebook” of important information; I’m attempting this as well, and perhaps will make it the subject of another post in the future…). So I made up the checklists on my computer, glued them to old file folders to make them thicker, and laminated them (so I could write with dry-erase markers and wipe it off).


For my monthly and seasonal tasks, I created a one page sheet with a list of monthly chores and dates completed, as well as a mini “calendar” of seasonal tasks and reminders. I added chores like washing windows, as well as reminders for Holiday activities and birthday celebrations.


I liked this better- not so many little cards floating around, and I could see at a glance each day what I needed to do. But I didn’t like keeping them in the notebook, as now I had a bulky notebook on my counter. As if there isn’t enough junk on there already… So I tried hanging them on the fridge with a magnetic clip. Better… But then I thought of a revision…


Better known as Attempt #3. When it comes to daily planners, I would much rather have a weekly view. In my first job out of college, I got very excited about getting a pda. However, after I used it for a week or so, I realized that I hated having to see only one day at a time. I’ve only ever liked a daily planner once, and that was in Honduras when I had a million different things to remember each day (and plus, it was free!). So I made this:


This shows all my tasks in one weekly view. Inspired by this homemade beautiful dry erase board from Make It and Love It (another awesome idea I’d like to do- they are so much prettier than my $2 Ollie’s dry erase board!), I put it in a picture frame, and plan to hang it on the wall beside my dry erase board and magnetic boards.


In my head, I like that I’ll be able to see everything at a glance, and know what I’ve done (or not done!) that week. And I can use my dry-erase markers and check things off or add new ones, and then… viola!- clean slate for the next week.


I’ll let you know how it works, and in the meantime, I’d love to know what works for you! How do you organize the running of your household?


Wednesday, July 21, 2010

Wallet for Cash Envelope System

I’m just a little bit proud of this…in a good way.


I have been wanting a new wallet to make using the envelope system for cash easier to use. I currently just grab extra envelopes at the bank, and label them and stuff them in my wallet. I don’t think they’ll last very long though, and if I have to “sneak” a little from another envelope, I have to shuffle through and peek into a bunch to see what I have. With this wallet, I can see quickly what I’ve got!


It has a plastic dividers in it, a coin pocket, credit card slots, and an extra pocket in the back.


It took a lot of blood, sweat and tears though (not literally, thank goodness!). I goofed up a few times... lets's just say next time I’ll be making a paper pattern first!


This time I used a cheapo coupon organizer from the dollar store (I LOVE the dollar store!) for the dividers. It even has handy little stickers with it to label the tabs!


So despite all my mess-ups, I’d say it was a successful project! I have 2 other ideas in mind, so I think I’ll be making a few more!


If anyone is interested in making your own, and wants to know how I did it, leave a note and I’ll do a description. I didn’t take pictures during the process (thank goodness, how embarrassing would that have been…) but I can explain how to make your own. It is fairly simple with directions (and the right measurements!)!


Thursday, July 8, 2010

Entryway Organization!

After finding little items floating all over the place in our entryway and getting stuck in different places, i decided to make an organizer!

I measured the size I wanted and planned out my pockets (though I did some switching when i sewed since they seemed a bit small on the one row!).   I made my own bias tape to top off the vinyl and go around the outside.  I sewed the bias tape to the top of my pockets first, then sewed them onto the main body fabric.  Then I sewed the strip along the bottom of the pockets to hide the raw edges, and finally sewed it around the outside and added the ties.

I'm pretty happy so far, though we'll see how it holds up when L realizes it's there... It's not my favorite fabric either- just some I had around the house, but I didn't have to buy anything! Free is always good... Now we'll see if I get around to doing another soon for the living room- I need to get those remote controls, and Playstation stuff rounded up!

As a side-note, you could very easily do this with a shoe organizer or similar item if you don't sew!  I'm just too cheap frugal to buy one!  And I like that this fits the items I want and I can see through the pockets!

oh, and btw, I'm so  excited for the chance to win a Silhouette digital cutting tool!  you can too- check it out at Little Birdie Secrets here!