Pages

Showing posts with label kids. Show all posts

Saturday, June 7, 2014

Bubble shorts for L

I won some Peek a Boo patterns a LOOOONG time ago and even bought a couple on sale and have finally gotten around to sewing them! (I thought this was my first, but realized I did a Hang Out Hoodie a year or two ago...).

So L has about 2 pairs of shorts for this summer. She has lots of little skorts but I figured I'd finally get around to the Bubble Shorts pattern! I made a size larger hoping they would last longer and it is a good thing because they are almost too tight in the cuffs!  The next pair will probably be an inch or so longer and I will probably have to add a half inch or so to the cuffs.  

I made these shorts out of a mens shirt that I got in my stash of stuff from Sunshine Connection here in town - 50 cents for a bag of clothes so I'm thinking it cost me.... maybe a nickel?  LOVED the color and was so glad when L picked it for these shorts!  I still have lots of fabric left over so we'll see if I can sneak something out of it for the baby! 


Thursday, May 22, 2014

Bed Space Saver!

We had seen some posts floating around Pinterest of beds built with drawers underneath to save space (like this one).  I immediately LOVED this idea and even found plans to build them on Ana White's amazing site!  I soon realized that basically all this was was a bed build on top of a dresser and set out to convince my amazingly handy husband to figure out how to do a thrifty-er version!  We ended up with this amazing bed that we all LOVE. (Disclaimer: if I were a "real" blogger, this post would be full of beautiful pictures, however, it's just me blabbing about my projects so... you know. You get messy rooms and clothes and stuff everywhere, because that's life around here!)


We found the dresser at our local Goodwill for $15!  (I wanted it when it was $30 but the hubby thought that was too much and snagged it when they put it on sale!)

It is not solid wood but is very solid and sturdy and I knew I would paint it anyway (and I have a very hard time painting over wood...)


This is the first picture I took of the process, already sanded to scuff it up a bit for paint, and minus the drawers.


We painted it that lovely deep purple, and awesome hubby figured out how to take her existing bed and put it on top. I believe he screwed the actual sides of the bedframe into the wall, and also added some 2x4 brace posts as well. It is also screwed down into the dresser (obviously not in this picture yet, since we switched the position!). You can see above how this does leave a good size space behind the dresser.  We had thought about adding a little bookshelf door that would swing out, but for right now, her hamper sits right in the hole, and it's used as a fun little hideaway!  Eventually, it will be great to store things like larger or out of season clothes, etc. 


A nice big 1x10 with some matching curves cut into the top makes a nice guardrail so she won't fall off in the middle of the night. 


And some matching paint to bring it all together! The sticker just adds the finishing touch, we got it from Icon Wall Stickers when I won a giveaway...just pretend it isn't slightly crooked! (The little clothes labels I also won in a giveaway from Crafterhours.)

She will be sharing her room with her baby sister and this helps consolidate furniture so much!  We love that its a "fun" bed to sleep on since its higher, but is still fairly easy for mom to help make up with sheets if needed.  We will probably do another when baby girl is old enough to need one (though there is a debate about that vs. a bunk built up above...). We'll see...

Wednesday, February 19, 2014

Pattern Testing: the Lucille Top

This was another one from lovelier weather...also from Shwin & Shwin.  This is the Lucille Top!


You could easily make a dress as well.  Again, we upcycled from 2 teeshirts.


You can see the cute pleating on the shoulders in these pictures. 


It's such a stylish little top with leggings, jeans or whatever!  

Pattern Testing: Every Little Thing Top

A long while back (as you can tell by the warm weather pictures...) I did one of my first pattern tests for Shwin & Shwin. The Every Little Thing Top and Dress.

We did the tunic length.  So cute and simple; no hemming with the cute band at the bottom.  We used an old crib sheet and some pink polka dot fabric I had in the stash.


And its another chance to practice your buttonholes!  You could easily do snaps, or even a hook and eye instead, but buttons really aren't as difficult as they seem!

Another great, solid pattern from Shwin & Shwin!  It goes from 6 months to 8 years so you can get a lot of use, especially with the tunic and dress lengths.  The pattern also has a bow option, which we obviously didn't do here, but may try in the future!

Pattern Testing: Rigby Polo

Another pattern I tested for Shwin & Shwin was the Rigby Polo.
Photo by Shwin & Shwin


This pattern is for wovens and I almost didn't test it, but I'm so glad I did.  The color blocking on the sleeves and pocket is so cute!


I added snaps to this after this photo (you can do buttons as well), and it can be worn open or closed.  This shirt was upcycled from a skirt (the plaid), and a pair of pants (that I had leftover from cutting out pants for E!).   


E really didn't NEED this top, since its short sleeved but I made it work by adding armwarmers (made from the Anytime at All Tee pattern!


They are super simple, I just made it a bit slimmer and cut the top arm band the exact size of his upper arm.  I think for a more active kid an even smaller band or some elastic might be needed...  Now E's wardrobe is much bigger since he can wear all of those short sleeve shirts he has!  I'll definitely be whipping up a few more pairs of these.

Sunday, February 16, 2014

Pattern Testing: the Anytime at All Tee!

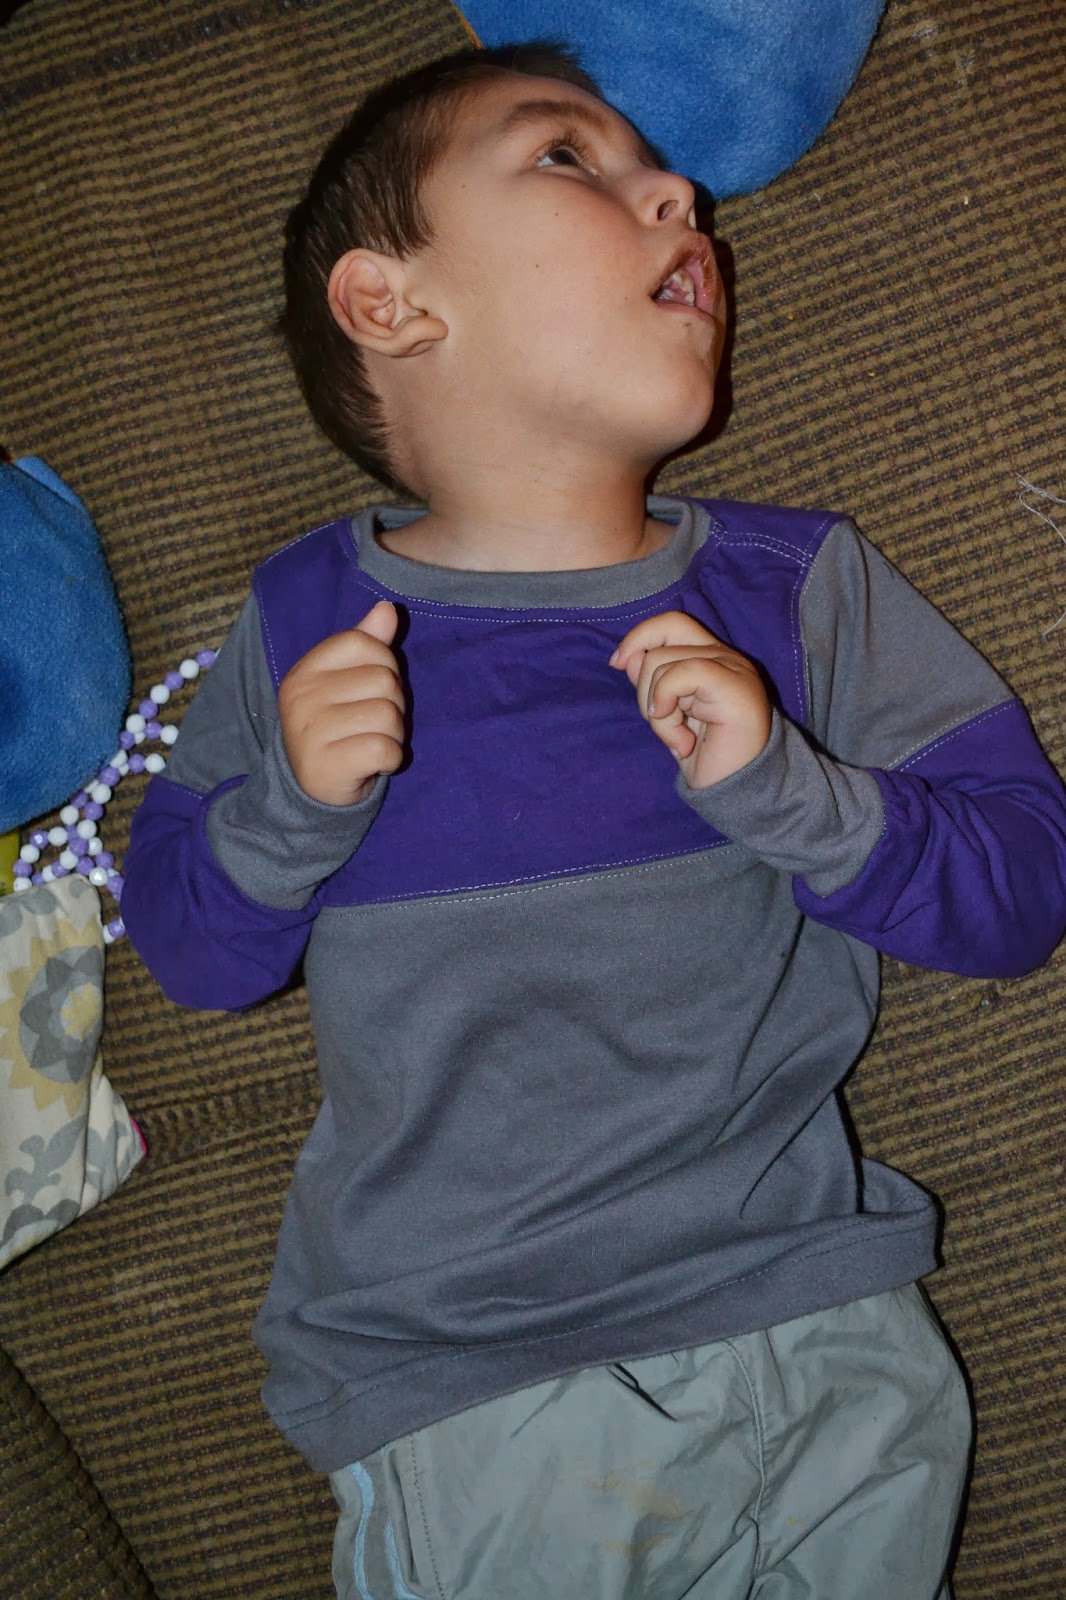
I'm so excited to be on a team of pattern testers for Shwin & Shwin.  They have a crafty sewing blog AND a pattern shop full of great patterns. Being a pattern tester means I get sneak peaks and sews of patterns she's working on, and the deadlines she gives are what I need to actually get things sewn up!  One of the ones I tested a little while back and again recently is the Anytime at All Tee, a GREAT basic tee-shirt with tons of options.  She gives colorblocking lines (2 different styles, plus you can mix and match to make slews of options!), pockets, short sleeves and long sleeves, and ruffles for girls! And one of the best things for me, is that the pattern goes from 3 months to 8 years old, and the 3-12 month patterns are bodysuits!  So useful for YEARS!  And its great for boys and girls! (I promise, I'm not an afiliate or anything... I just love this pattern and have already sewn it up 3 times plus using the arm pattern to make armwarmers for E!) 

And another important note:  Shwin & Shwin has this pattern along with other new patterns ON SALE!!! Just until midnight Sunday night, February 16, 2014, you can get it for $5.95 (regular $9)
Photo by Shwin & Shwin

So, on to my versions... Two I've sewn for E, who REALLY needs long sleeved tees since he jumped sizes on me and I wasn't prepared...


 This was the first one.  I try to sew most things from free or super cheap clothes I have stashed, and this was scrapped together from two tees. Obviously I did the colorblocking and long sleeves. LOVE it.  Such a great pattern.  If you check out the pattern page here or the photo above, you'll see there are tons of options with the colorblocking. Also below, I didn't do color blocking on the bodice, but still added it in the arms.  


Again, sewn up from two tees.  This is a pattern that pays for itself, if you have a thrift store that sells off stuff super cheap (mine gets rid of stuff for $0.49!) or buy from yard sales or take cast offs from family and friends!  I can't always find clothes in the right size at our Goodwill for 49 cents, but I can ALWAYS find tons of great fabric!


This is a really terrible picture, BUT I just wanted to show a girly version quick; this was Lia's Christmas outfit this year. The top is from the Anytime Tee pattern with ruffles (and sequins but really, don't ask...).  I also added a band at the bottom of hers, which was super easy, to help it look nice with her skirt.   Yet another great DIY option for a girl's top!  

So if you sew, check out the pattern and snap it up before prices go up.  There also a few other new patterns on sale too, so check them out as well!  (the pattern review post on her blog is here.) i have a couple more things I am now allowed to share coming up, and a few I forgot about completely too...

Thursday, May 23, 2013

Anywhere Dress Pattern Review

I am doing my own little Kids Clothing Week this week, since I wasn't prepared for the "real" one. (We'll just pretend I am prepared this week and not just spending my hour taping patterns and cutting fabric...).  The first thing I finished up was an 
Anywhere Dress from Go To Patterns (affiliate links)


This dress is simple and the PDF pattern makes it even easier to sew up!  There are just a few pieces to cut out; adding in the facings make it seem like more but they really save you so much time later since you don't have to do any binding at the neck! 
You can see the neckline on this picture. The facing is the inside piece that helps finish off the neckline.
Another great thing about the pattern (and most patterns from Go To Patterns) is that it includes sizes for 12 months to 12 years!! That is an amazing range you DO NOT get with traditional paper patterns.  Plus they are so simple to sew from, and include tons of detailed instructions and photos.  Plus the designers are usually available to answer questions!

My only complaint of the entire pattern is that the front and back dress pieces  use the same letters as marks for connecting the PDF pattern pieces (if you've never used a pdf pattern, most have little matching marks that show you which pieces to tape together and line them up correctly). And this is pretty much a moot point, since they are mirror images of each other so it's pretty obvious which goes where.  


It is a little large, but that is not a fault of the pattern.  I made her a size 6 because I don't want her to grow out of it this summer!  Still wearable now, but should last for quite a while! I did cut the hemline to the next size to make it a bit longer. I'm not positive I would do that again though- it feels a bit long and I'm not sure if it is because of the next size up sizing or if its just cut too long.  I thought the pictures of the models looked a smidge short for our tastes though... 

While I usually try to be cheap thrifty and use larger size clothes for fabric, I bought this at Joann's because I loved it! It's not as unique though...I actually showed a picture of this exact dress to L though, to show her what it would look like with her sleeve choice!


Pictures are not great, regrettably.... snapped quickly before school this morning (thus little bro in his PJ's...yep, we'll just pretend he doesn't also end up wearing those most of the day...)!

Anyway, this was a great pattern and I'll definitely be using it more!  I can see it coming in super handy to make tee-shirts with as well! This would be an amazing beginning project for using knits.  They are not as scary as they seem and make such amazing comfy clothes!

Next up: the Hangout Hoodie from Peek-a-Boo Pattern Shop! (affiliate links)


I recieved a copy of this pattern for free in exchange for my honest review.

Tuesday, April 2, 2013

Pajama Eaters!

Instead of an Easter basket, I decided to make L a Pajama Eater!  


I bought the pattern by Sew Fearless which means that I can make them to sell.  Which I plan to do!

My daughter has the habit of stepping past (or on top of) all the jammies on her floor she has only worn for one night to get new ones!  So, Theoretically, this will help with that problem as she was told she can only have out what the PJ Eater can fit!  
See the zipper? I am pretty sure she stuffed about three pairs in there this time, but hopefully we can whittle it down to one at a time!  These little guys are so cute sitting around too! 

This little guy snuck into her room when she was sleeping and sat down to wait... I'm kind of surprised those Peeps made it through the night....

I had to make a few adjustments; since I don't keep felt around (and of course a certain store was out of white!), I made the teeth like I did on E's dinosaur jacket....oh wait. It looks like I never blogged that.... Anyhoo.... like the teeth on this jacket tutorial.  Much more time consuming that felt, so I'll be getting some of that... otherwise I followed that pattern. Great pattern if you want to try a few!  The pattern included the rights to sell them, so I will be sewing up a few in the near future!  Drop me a line if you want first dibs!

Monday, April 1, 2013

Matchy Matchy Easter....

I finally got the kids dressed cute for Easter this year... No group picture unfortunately. The only one I got was less than satisfactory since the baby didn't understand why he couldn't have breakfast (wanted him to not be bored during breakfast at church!).  

Anyway, I sewed L a little dress, and the boys little matching bowties. I basically followed this tutorial but made double bows, and used elastic to hold them on. 


They looked so adorable... Maybe they should wear bowties and button downs every sunday...

L's Dress was sort of based off this dress by Simple Simon & Co; I used the flutter sleeve tutorial on this page, though I think they missed a seam allowance in the directions, so it was a little shorter than I wanted... I am very happy with the dress though.  I traced a tee shirt to make the bodice and then just added a full skirt.  I lined both top and bottom, since the fabric is a little light. 
The flutter sleeves were flipped over for all the pictures... oops!

She was happy with it, and they all looked great!

Thursday, November 8, 2012

Sew your own leggings!

I had the chance to test a pattern for Andrea at Go To Patterns, a site with lots of downloadable patterns for men, women and children.  The one i got to try out was the Go To Leggings Pattern. (Use my affiliate link here or click on the ad on the sidebar to use my link!)


I love that there are so many options!  Just look at that list!  

We chose to do the peekaboo leggings. Once your pattern is printed, cut out and taped, these come together SO quickly!  The waistband elastic is such a simple method (one I'll be using again!). These are simple enough for a beginner project.

Disclaimer: my pictures are awful. Super quickies... and I was lazy and didn't put on the bows yet... :) and don't mind my daughter's crazy hair... anyway...

 I love the way the peekaboos look on capris (as in the designers photo), they do get a bit lost on the longer ones, at least until she gets a smidge taller.  And plus she keeps trying to use them as stirrup pants.... is that coming back around or just in her head?!

Below is the option with the attached skirt and capris.  I love the way these patterns are sized, there is so much room for them to grow. She definitely will be able to wear these for a few years.  

One of the things I love best about sewing clothes?  These outfits cost me 29 cents and 58 cents respectively! (Plus thread and elastic- unless you too save elastic you cut off your husbands old boxer briefs before they go out with the trash...) They are upcycled from clothes I found at our Goodwill which has sales on certain tag colors. 

Depending on how you cut, you can save a little work by using existing hems (which i did on this striped skirt and leggings above)! 

At first I wondered if I would be able to fit a pair of leggings- but it worked!  the flowered ones above are from a size large womens shirt. And for the longer pair, I used a knit nightshirt.  You can always find knit pants or dresses to reuse as well. 

I would definitely recommend this pattern! With so many sizes and options, it will last you for many years to come! Check out her shop for this and other patterns!

Wednesday, September 5, 2012

E's school bag!

My oldest son E (with C-ACC) went for his first day of school today at the intermediate units 3-5 classroom.  Sniff Sniff.  He needed a bag for his cup, snack, diapers, tubes, etc, so I decided to sew him a little bag.  I first had planned on a backpack, but switched it to a little messenger bag, the perfect size for his school needs.  
 I gave it two elastic topped pockets inside, currently holding diapers and wipes, and sunscreen. And lots of room left in the main part for burp clothes, extra clothes etc. 

 There are 2 front pockets as well, currently for his G-tube necessities.  

 And the standard full back pocket that carries his folder for notes from the teacher or therapists.  

I attached one side of the strap with snaps, (which will hopefully be long enough!) to give me some flexibility with the length. I want to be able to hang it around his stroller or wheelchair (which we don't have yet) so i figured I may need to shorten it, especially if (WHEN!) we get to the point where he can carry it around himself.  

I am in love with the size and  how it turned out and may need to whip up another for a dedicated diaper bag- right now, a huge purse takes care of both, but I have been wanting something different.

Sunday, March 4, 2012

Wetbags

After about 6 months of saying I need to make a few more wetbags I finally did them... a few hours and I have 3 lovely new bags. I used PUL and this tutorial for an oilcoth wristlet.  I used my own dimension, and didnt cut the top and bottom like she did- I'm not really sure what the point would be of that...


Wetbags are so handy even if you don't cloth diaper! Think swim clothes, pukey/poopy clothes etc!


I also  added elastcs so they could be rolled up and tucked in the diaper bag. It took a few tries but I got it the way I like now!

If you dont have pul, I have also made them from fabric with a shower curtain lining!