Pages

Showing posts with label recipes. Show all posts

Friday, March 9, 2012

Recipe Organization

I have been (attempting to) follow along with the 52 Weeks of An Organized Home Challenge. I won't say I've done every challenge, but I have done most; the one I was most excited about was this one: Organize Recipes and Cookbooks. What I really like about this challenge is that every week, she send you an email with the challenge, and suggestions of different ways to complete it.  I had been planning to make up a recipe binder for all my paper recipes- I have magazine pullouts, recipe cards, cookbooks, ideas on the computer, Taste of Home magazines... so confusing when I know i have a recipe and can't remember where it is!  I'd always seen recipe binders and thought it was the best option.  But in the challenge, she included a section on digital organization and mentioned Evernote


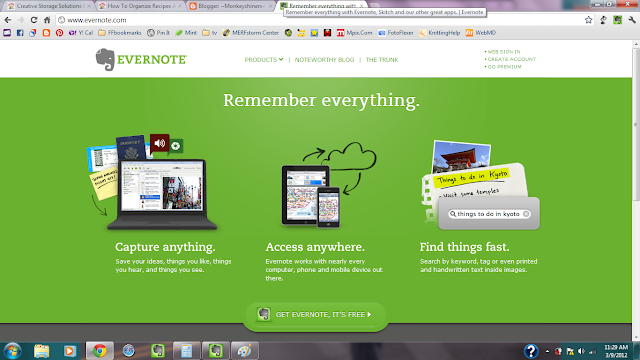
I LOVE IT.  I'd heard of it before but for some reason had decided against using it (just in general, not even thinking of recipes). When she suggested it as an option, I went back and revisited. It is an amazing program and it is FREE!  


You can get an Evernote app for almost anything- I have it on my computer, Nook, and I-Pod Touch. So you can access it anywhere.  


The sidebar is where you can see your "notebooks"

As you can see, I'm not only using it for recipes, and haven't even begun to really use it as I hope to.  But you can see above that you can create sub-groups of notebooks, such as my "RECIPES" group above. Below I have all my categories.  And within each notebook, it looks like this.
On the far left, is the sidebar I have already shown you. The next row is all the Notes within the chosen Notebook. You can see I have chosen the "Main" notebook to show you.  So the second row has all the recipes I have collected so far within the Main category.  As you choose it, it shows up in the view box.  You can edit, add tags, comments etc.  This recipe was taken from the web using the Evernote clipper, which is amazing!  You can snip out any part of a webpage you want and put it in evernote! The program automatically records the URL in case you need to easily find it again.  This all is made even easier by the Evernote Clearly tool, which gives you a screen with just the article, no buttons, ads, etc. This makes for non-distracted reading, but also is a super easy way to clip just what you want from the page. The purple lettering above is  my note after making this for dinner!


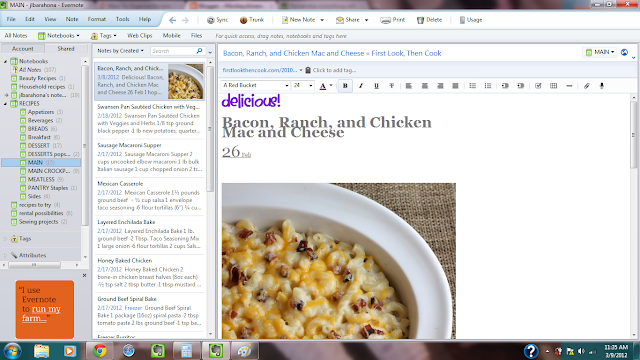
Now to menu plan, I've begun to use the "recipes to try" notebook.  There are several super easy ways to change the notebook of an item; you can grab the item from the second row, where the notes are listed, and pull it to the notebook you want, or you can click on the upper right of the note and change it from a drop down menu. So I pull recipes I want to try into the notebook, and put them back as I'm finished.  


Recipes I have already typed out on the computer (I had been attempting to do nice recipe cards) can just be copied and pasted into a note. You can pull in pictures if you have them, add pdfs, links to other recipes and tons of other things I've not even discovered.  


I have been loving that I can pull things up on my ipod or nook (since we only have one computer, its nice to not need it for a recipe). And since our internet is spotty, it is amazing to have all these on the computer, but also backed up to Evernote's site. I don't have to worry about losing them if our computer crashes! And I've found on my ipod that if I connect to the internet and open a note, its then available there as I need it, internet or no!


Another amazing thing about Evernote is the search function. It can search within things you've typed, things you've clipped from the internet, pdfs, almost anything!  So if I have some avocados I need to use up, all I need to do is search for "avocado".
Obviously, I need some more avocado recipes, but get the picture?  I'm not even positive I need all the separate category notebooks with the search and also the tags (categories, like you can do with your pictures). But they are there for now...


According to the Evernote site and blog, people are using evernote to organize their entire lives.  Financial information, tax preparation, trip planning. Its amazing.  


My goal is to be able to get rid of all the paper recipes I have floating around.  I plan to scan in all my magazine pages (apparently there is a "scan to evernote" app for some printers that I haven't been able to set up yet that makes it so easy), copy and paste all my typed recipes, and clip ones I find on the internet.  For now, I've been using Pinterest for meal inspiration and ideas.
and moving them into Evernote as I use them, either from Pinterest, my computer, or a paper recipe.


I also created notes like this:
Here, I plan to write my favorite recipes from my cookbooks. I'm not quite ready to get rid of those yet, though the recipes from books I use less frequently may end up being scanned into evernote...


The possibilities are almost endless.I am so glad I discovered this and really excited about seeing the potential in organizing the rest of my life!  


UPDATE!!!
I remembered seeing something on the evernote blog about linking notes... I went searching (found it on the first try!) and ... AHA!  The perfect menu planning system. So ignore what I wrote above, this will save time and I won't have to put recipes "away"!
It might be hard to see... but I made myself a table with the days of the week.  See the letters on the left side?  That's the link to the recipe I'll use that day!  By right clicking on a recipe (on that middle bar with the pictures) and choosing "copy note link", you copy the URL and can then past it into your chart (control + v). I still will write them out on my notepad (I got a days of the week notepad in the dollar section at walmart that I've been using) for quick peeks at the menu when I'm not at my computer, but this way I'll have it here too! And it will be easier to find the recipes for each day. 

Sunday, July 17, 2011

Yummy Drinks!

Need a really refreshing and super easy summer drink? (well, I’ll be making this year round but…). I found this recipe for Brazilian Lemonade on this site, though it was originally posted on here on allrecipes.com.  It is so easy- no tedious squeezing of limes to get out every last drop of the precious juice. You just toss it all in the blender and then strain out the large chunks of lime. I may actually try straining them out and then pressing out a bit more of the juice, but it worked perfectly well as written. Also, several people on both sites mentioned liking their limeade a bit more sour so changed the amounts of water/sugar/sweetened condensed milk (Yes, that’s all you need!) but for me it was perfect as written, but you can change to your liking.  I used fat free condensed milk, and probably will skip adding ice to the blender (not sure what the point of that was as it strains out anyway!).  I very much recommend this recipe though, super easy and refreshing!

I also was anxious to try the recipe for Cold Brewed iced Coffee from this site.  So easy to do, just grinding beans, adding cold water and putting in the fridge overnight. See her blog though for tips. It was good, but I had not so much patience for figuring out what I like mixed with it... I went back to my cousin's awesome recipe: (hopefully she doesn't mind me sharing here...) 

Brew a pot of coffee using 1 cup coffee, 3-4 tablespoons of cocoa and a dash of cinnamon and 8 cups of water. mix in 1/2 cup of sweetened condensed milk and then add it to a pitcher with ice, milk, water, whatever your preference!  its just as written, but if you want to experiment by adding a bit of coffee syrup or flavored creamer, all the better! I mixed in the condensed milk and then kept that in the fridge as concentrate, adding it to milk and ice in my cup.  Delicious... Love that I can easily use decaf so the baby's not bouncing off the walls of my womb...


Don't forget about my watermelon lime licuados and slushies from The Idea Attic!

Tuesday, September 7, 2010

Watermelon Lime "Licuados" and Slushies

Check out my friend Rebecca's blog, The Mommy Saver: Moms saving money, time and sanity. She gives tips for saving time and money in your household as well as yummy freezer cooking recipes. And, she's doing a giveaway right now of my Monkeyshiners items! Check out her blog here and enter to win a pacifier leash, bib clip, OR $5 off your purchase!
Giveaway ends Friday, September 10.


I have always loved "licuados" or smoothies and in Honduras they were so cheap, I could actually get them frequently! My favorite in Honduras was watermelon with orange juice (Yum, try it!).

In my new found fascination with blogs, I found this delicious recipe to try! It is a very yummy slushy drink with frozen watermelon, ginger ale and limeade. 

I also made my own version (since I was too lazy to go downstairs to my freezer!) that is more smoothie/licuado than slushy. 
Pardon my photo... It's terrible...

I used my blender of course, and added lots of watermelon, as well as the juice that accumulates at the bottom of your bowl when you have cut watermelon, a big scoop of frozen limeade concentrate, and a handful or so of ice.  Blend it all together!

My husband loves both these recipes too!  Delicious and very refreshing! 

Saturday, July 24, 2010

Yummy Cheesy Texas Bake and my fave Cornbread recipe

I just tried this recipe the other night from Camille's CasaCheesy Texas Bake. Yummy!  I loved it!  Cheesy, a bit spicy, mmm. Thought, to be honest, my hubby was not so thrilled.  He thought there was too much cornbread and not enough other stuff!  So perhaps next time (after I've used up the freezer meal!) I'll try doubling the inside ingredients.


Click here for the recipe and instructions complete with photos! 

As I hinted above, this is another great recipe where you can make one and freeze one for later!  I love having already made up things in the freezer!  All I have to do is remember to pull it out to thaw and Bake!

I did change a few things: I threw in a can of corn instead of the 1 cup frozen, and made my own cornbread recipe for the top. 
 This is the one I love, Elizabeth Yoder's Corn Bread from the Tasteful Treasures Cookbook (Allensville Bicentennial).

1 cup flour
1/2 cup cornmeal
1/2 cup sugar
2 tsp baking powder
1/2 tsp salt
1/2 cup soft margarine
1 egg
2/3 cup milk
Sift flour, cornmeal, sugar, baking powder and salt into a mixing bowl. Stir in margarine, egg and milk til flour is moistened. Then beat 2 minutes with an electric mixer. Pour into a greased 8 or 9 inch square pan. bake at 350 degrees for 20-25 minutes. Yields: 9-12 servings

A few notes:  I never sift; I rarely feel like getting out my electric mixer, so i just mix it good by hand for 30 seconds or so - and it still turns out great, everytime! 

I made 2 batches of this, one for each dish of the Cheesy Texas Bake.
Enjoy!

Wednesday, July 14, 2010

Yummy and EASY Pizza Crust Recipe

I have tried so many pizza recipes.... but this one is definitely my favorite and the easiest to work with!  It definitely made nicer dough than the store bought packets I've tried (or any of the home made recipes for that matter!) So give it a try (even if you're a bought pizza or pizza dough mix kind of cook!)

It's from Oopsey Daisy, a great blog with lots of fun crafty ideas (and good recipes too!)

Click here for Oopsey Daisy's Best Ever Pizza Crust recipe (the one that even her hubby approves of!)!

Monday, July 12, 2010

Fantabulous Grilled Cheesy Potatoes

I Love love love this grilled potatoes recipe so I thought I'd share! It's sooooooo yummy. If you are on a diet though, you might want to look the other way...

Grilled Cheesy Potatoes (from tasteofhome.com)
3 cups cubed red potatoes
5 tbsp water, divided
3/4 to 1 cup shredded cheddar or other cheese
1 large onion, finely chopped, or 2 heaped tbsp dried minced onion
1 tbsp worcestershire sauce
1/2 tsp salt
1/4 tsp garlic powder
1/4 tsp pepper
2 tbsp butter

Place potatoes and 3 tbsp water in a bowl; cover and microwave on high for 3-4 minutes or til almost tender; drain.
In a large bowl, combine cheese and onion. Stir in the potatoes. Transfer to a double thickness of greased heavy-duty foil (about 18 inches square).
combine the Worcestershire, salt, garlic powder, pepper, and remaining 2 tbsp water. Sprinkle over potatoes. Dot with butter.
Fold foil around the potato mixture and seal tightly. Grill, uncovered, over medium heat for 8-10 minutes or til potatoes are tender and cheese is melted.

Enjoy!